Tools For Carving Better Pumpkins

UPDATE September 19, 2015: Want to learn how to carve pumpkins? I’m creating a set of step-by-step video tutorials. Check out Carve Awesome Pumpkins for more info!

~~~

Hard to believe it’s October already! It’s time to start carving pumpkins, if you haven’t already!  Because I like to carve foam pumpkins I can display year after year, I start carving in September or earlier. The foam pumpkins require a different carving process than real pumpkins.  Check out these tips and gather your supplies!

This year, I added a new toy:

MOTO TOOL FOOT PEDAL for power tools

This allows me to not only turn my dremel on and off with my foot, but also control the speed. Now I can keep a hand on my pumpkin while turning the dremel on or off!

The main reason I picked up a foot pedal for the dremel was so that I could finally use the flex shaft attachment:

But before I can use the flex shaft attachment, I need a place to hang the dremel. When you use the flex shaft attachment, the dremel must be located above you for it to work properly. Earlier this spring, we replaced our deck with a patio, so now I carve outside. (Makes for much easier clean up!)  But, there’s nothing above me to hang the dremel on.

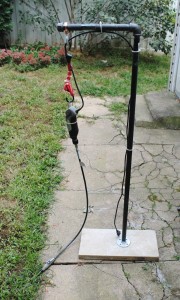
I’m going to have my husband help me build a stand to hang the dremel on, much like this one, only taller:

Dremel Stand

You can find the instructions on how to build your own on the forum at Stoneykins.com.

Speaking of Stoneykins.com, don’t forget about this coupon:

stoneykins coupon pumpkin carving patterns

For more info about getting starting with pumpkin carving, see:

Happy Carving!

Amazon links are affiliate links

Stoneykins Coupon for Pumpkin Carving Patterns

UPDATE September 19, 2015: Want to learn how to carve pumpkins? I’m creating a set of step-by-step video tutorials. Check out Carve Awesome Pumpkins for more info!

~~~

It’s that time of year again!

pumpkins to carve

I’m running behind this year already. I’m not even sure what I’m going to carve yet, never mind the carving itself!  I don’t have a long series of posts planned for this year, but I will search out any new YA-themed pumpkin patterns and share them with you in October.

In the meantime, here’s last year’s series to get you started:

And here’s a coupon for stoneykins.com — the web’s best pumpkin patterns!

stoneykins coupon


Have you started carving yet? How about planning what to carve?

How to Fix a Hole in a Cross Stitch Project

Nothing stops a stitcher’s heart like seeing a hole in the middle of a project that has hours and hours of hard work into it.  Unfortunately, two-year-olds with scissors happen. Fortunately, it is possible to fix the holes without trashing the project!

(NOTE: These steps assume the fabric is a linen or an evenweave, not aida.)

Step 1: Assess the damage
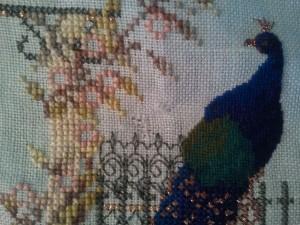
Two holes cut in my fabric

My toddler cut two holes in the fabric.


Once you have a cool head, study the damaged section and the surrounding stitching. We’re going to be removing all of the cut threads and weaving in new threads. For that, we’ll need sturdy stitching to tie off the ends and hold everything securely.

As you can see in my photo, I had some blackwork (running stitch) very close to one of the holes.  Although I hated having to rip it all out and redo, it beats the alternative: starting the whole project all over again!

Cross stitches and kloster blocks (if the “knuckles” are along the cut edge) are sturdy enough to support the repaired fabric.  Backstitching, running stitch, and some other specialty stitches are not.

Step 2: Pull out the cut threads
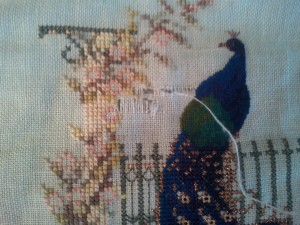
Pull out the cut threads to the nearest stable stitch

Pulling out the cut threads

When I say “threads” here, I’m referring to the threads of the fabric, not the threads used for stitching.

Very carefully use your needle to un-weave the cut threads until you reach a stitched area.

Remove both horizontal and vertical threads, but only remove the ones that are cut. You don’t want to have to remove any more than you have to!

Do not cut the threads you un-weave!

Step 3: Secure the threads
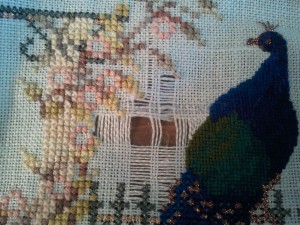
All cut threads pulled out

All of the cut threads have been pulled out and tied off on the back

Pull all of the threads you’ve un-woven to the back of the fabric. Tie them off securely by running under the stitches.

Some sections might be complete holes and some might have only horizontal or only vertical threads. Don’t panic!

Step 4: Remove threads from the edges
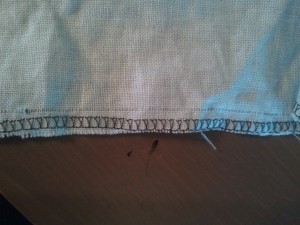
Pull a thread from the edge of the fabric

Remove a thread from the edge of the fabric

Very carefully remove a few threads from the edge of the fabric to use to re-weave the fabric.

I’m not sure if it was because the fabric I’m using is a linen, but I found that the threads I pulled out frayed very easily, and even broke if I pulled too hard.  An evenweave may not have those problems.  My suggestion would be to use short pieces for re-weaving.  The pieces only need to be long enough to cover the length of the missing thread, plus extra for securing.

Step 5: Re-weave the horizontal threads
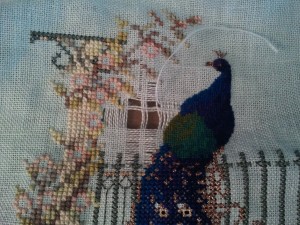
Re-weaving new threads

Re-weaving the horizontal threads


It doesn’t matter if you do the horizontal or vertical threads first, but you should do all of one direction before starting on the other one.  I chose to do the horizontal threads first, but for no particular reason.

  • Start next to a thread still in the fabric, not in the middle of a hole.
  • Secure one of the threads you pulled out of the edge in the stitches.
  • Weave the new thread over and under the existing vertical threads. Pay attention to get the weave correct. When the existing adjacent thread is going under, you go over. And vice-versa.
  • Continue weaving over and under until you reach the stitches on the other side.  Make sure the new thread you’ve woven in is straight and pulled with the proper tension to match the existing threads of the fabric.
  • Secure the thread by sliding it under the stitches on the back.
  • If the remaining thread is long enough to go back the other way, you can continue weaving. Otherwise, tie off and secure a new thread to continue.

Take care to be sure you re-weave the correct number of threads. Double check to make sure the weave is correct and alternates going over and under — in both directions, horizontal and vertical.

Step 6: Re-weave the vertical threads
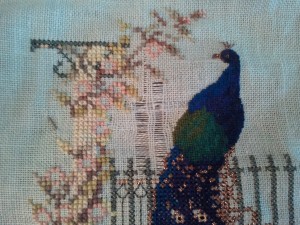
All horizontal threads re-weaved

All of the horizontal threads have been re-woven. On to the vertical threads!


Re-weave the vertical threads the same way as the horizontal threads.

Finished!
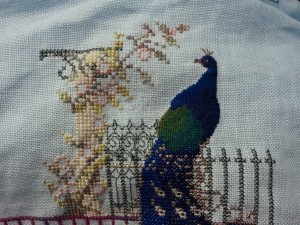
Finished

The holes are fixed and the blackwork re-stitched.

Up close, it’s clear that the fabric was repaired, however when you step back it’s not as noticeable.  I didn’t plan on entering this into any contests anyway, and it’s better than starting over!
Finished

The repaired piece

While I wish I didn’t have to spend those extra hours fixing the project, the damage could have been worse. And I’ll be sure to keep my project and the scissors out of the toddler’s reach now. 😉

When I’m Not Writing: Stitching Misty Morning Vineyard

After NaNoWriMo,  I took December off from writing. Cleaning up the basement inspired me to pick up one of my other hobbies: needlework.  Needlework used to be one of my very favorite hobbies, the one I did all the time, but something that requires the use of both hands doesn’t fit well with a baby in the house. Now that my youngest is 2, though, I can start picking it up again.

I have a bazillion works-in-progress and to-be-started projects (that’s only a slight exaggeration) and for the first few days I was actually frozen while choosing what to work on.  So many choices!

I settled on Misty Morning Vineyard designed by Martina Rosenberg (formerly Weber).  It was originally released as a “Mystery” project, meaning that a new piece of the chart was revealed each month over the course of am entire year.  So when I started the project, I had no idea what it would look like. Talk about a leap of faith.

(BTW, that year was 2003.  And this month was probably the first time I picked up the project since then. Hah!)

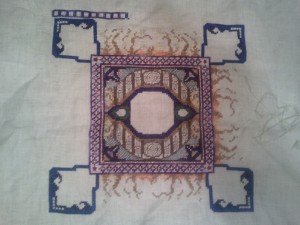
I forgot to take a picture before I started stitching on it, but this is how it looked after a few days.  (I’d finished the 2nd and three side with the trees, and the purple row of boxes on the upper left.)

Needlework in Progress 1


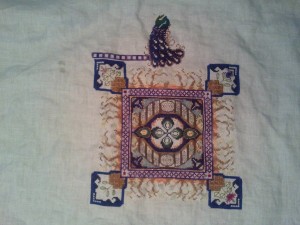
Here’s what it looks like today, January 1st:
Needlework in Progress 2


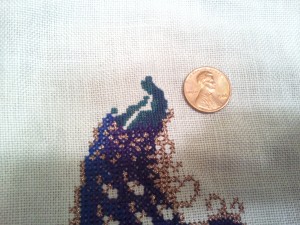
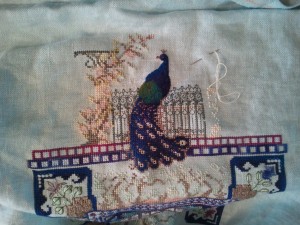
Here’s a close-up of the peacock. It’s intense, let me tell you!  Each stitch in the peacock’s body is a quarter of the size of the stitches in the rest of the piece.  It’s called over-one stitching, and while it is slow and intense to stitch, it allows for more color and detail than the standard over-two stitching.

Peacock over 1


I’m stitching Misty Morning Vineyard on (I believe) 32ct blue linen. Wedgewood might the official color, I’m not sure.  The threads used are a mix of Thread Gatherer Silk N’ Colors, Needlepoint Inc Silks, Caron Collection Waterlilies and Wildflowers, Rainbow Gallery Petite Treasure Brain, and Anchor Marlitt.  There’s also a lot of beading in the final step.  This is luxury stitching with all those silks. 🙂

And, also, expensive.

Sometime between 2003 and now, I lost one of the Thread Gatherer Silk N’ Colors skeins.  You can’t just walk into Joann’s and Michael’s to get silk thread.  I had to special order it from the local needlework shop (they had every color except the one I needed, of course.)

Eight dollars. For a single skein of thread. *faints*

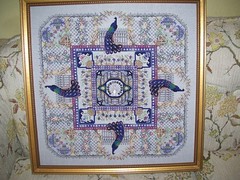
But it’ll be worth it in the end. Here’s a picture of the finished project, stitched by Jane from Illinois: (though our centers are different)

 
Misty Morning Vineyard